
-
Stylized 3D Windmill Low-Poly
1 × $1.00
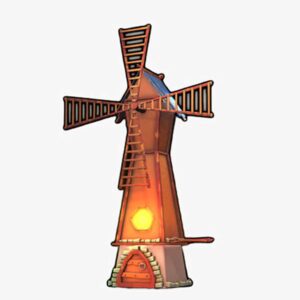
Subtotal: $1.00
Creating 3D NFT art is one of the most exciting ways for digital artists to share work and earn money online. The process looks technical at first, but it becomes simple once you understand the steps. This guide explains how to turn any 3D model into polished 3D NFT art. You will also learn how to use free resources, improve your art quality, and publish your work with confidence.
The market for NFT art continues to grow, and researchers show a yearly growth rate of more than fifteen percent according to HTF Market Insights. This means the demand for digital art, especially 3D NFT art, is becoming stronger every year. Collectors enjoy 3D pieces because they feel more alive and immersive. This makes your timing perfect if you want to create and sell your own 3D NFT art.
You only need a few tools to begin. The first tool is a 3D modeling program. Blender works great because it is free and powerful. Artists also use Maya or Cinema 4D, but Blender is the easiest for beginners.
The second tool is a crypto wallet. You need it to mint your NFT and pay gas fees.
The third requirement is a marketplace that accepts your file type. Many marketplaces support images and videos, but some also allow full 3D files. Thirdweb explains that modern platforms now accept formats like GLB or GLTF.
When you have these ready, you can begin creating 3D NFT art with confidence.
Start inside your 3D software. Build a model or import one that you want to upgrade. Make the shape clean. Add textures and materials that match the mood you want. Adjust surface details. Refine edges. Improve the silhouette.
Lighting matters a lot. A model can look average with poor lighting but stunning with the right setup. Use simple lights at first. A key light is enough to create shape and contrast. Then add a fill light if you need softer shadows.
Reduce unnecessary geometry. A heavy model creates large files. This slows down rendering. It also increases storage costs. Good optimization keeps your 3D NFT art efficient and attractive. GarageFarm explains that proper optimization creates better performance and smaller file size.
You can present your 3D model in two ways. The first method is to render it as an image or a short animation. This works well for marketplaces that display visual thumbnails. It is also easy for buyers to view.
The second method allows you to include the real 3D asset inside the NFT metadata. This method is more advanced. The buyer can load the model in a game engine or a virtual world. Thirdweb shares that interactive 3D NFTs are rising in popularity because collectors enjoy using digital assets inside virtual spaces.
Pick the method that fits your project. If you want quick results, choose a rendered image. If you want long term usability, choose the full 3D asset approach.
If you choose the rendering method, export a clean image. Use high resolution. Use sharp textures. Make your background simple so the model becomes the main focus.
If you choose the 3D file approach, export your model in GLB, GLTF, or OBJ. Compress textures. Reduce file size. Test the model by loading it in a free viewer.
Upload your files to a decentralized storage system like IPFS. Many platforms support it. This protects your art from file loss and helps maintain value over time.
Prepare your metadata. Give your artwork a title. Write a short story or a description. Add traits if you plan a collection. Clear metadata increases trust and helps your 3D NFT art stand out.
Choose a marketplace that supports your file type and your artistic goals. Some focus on images. Other support full 3D assets. Some offer royalty features. Rokoko explains that marketplace choice affects visibility and long term sales.
Check the gas fees and creator tools. Also check how many collectors use the platform. A larger platform usually gives more organic visibility but can be more competitive.
Connect your crypto wallet. Upload your metadata. Add your files. Review everything carefully. Pay the minting fee.
Once the NFT appears in your collection, you officially own a blockchain record of your 3D NFT art. This record proves ownership and authenticity.
If your NFT uses full 3D files, test the link to ensure everything loads correctly.
Collectors care about story. When you share your art, explain why you created it. Show early sketches or development screenshots. People love watching the process.
Create short posts on social platforms. Join 3D art communities. Connect with NFT groups. Be active. Honest communication builds trust. Buyers prefer creators they can understand.
Beinsure reports that modern collectors look for meaningful and unique works rather than fast hype. Quality and personality matter more than ever.
Try starting with free or low cost 3D assets when you learn. This reduces the time spent modeling everything from scratch. It also helps you practice lighting, shading, and rendering without feeling overwhelmed.
One of the helpful sources is Animatics Assets Store. It offers free 3D assets you can study, adapt, or use for learning. This is useful if you need a head start on your 3D NFT art. You can focus more on creativity and less on technical modeling. Since the assets are already optimized, your workflow becomes easier and faster. This is not a promotion. It is a practical resource for beginners who need quality starting points.
Keep your file sizes small. Heavy files reduce display quality on some marketplaces.
Document everything. Screenshots of your progress help you share the journey with your audience. This builds trust and makes your art feel more human.
Plan long term. A single artwork can sell, but a consistent collection creates a brand. A strong brand attracts loyal collectors.
Market research shows that NFT art continues to grow. Royalties are becoming standard. Artists earn from both the first sale and every future resale. CoinLaw notes that creators now enjoy stable revenue because of royalty enforcing contracts.
Collectors also want more immersive digital art, which means the future of 3D NFT art looks bright. If you start now, you build skills early in a field that is still growing.
Turning your 3D models into 3D NFT art is not difficult. It is a creative journey that anyone can start. You only need simple tools, a clear workflow, and patience.
Focus on quality. Focus on storytelling. Use free resources when you need help. Improve your lighting and textures. Optimize your files.
Every model you create brings you a step closer to becoming a skilled 3D NFT artist. Start small. Keep learning. Your next piece might become a collector’s favorite.