
How to Optimize 3D Models for Games to Boost Frame Rate and Reduce Lag
by Animatics Asset Store in Blog on November 6, 2025When I set out to optimize 3D models for games, I’ve learned that the difference between a smooth experience and a laggy mess often lies in how well you’ve prepared your assets. It’s not just about having great visuals, it’s about making sure those visuals run well on your target hardware.
In this article I’ll walk you through how I approach optimizing models for game engines, share techniques I use, and even mention a useful source of ready assets. This is aimed at giving you practical value not just theory.
Why optimisation matters for frame rate and lag
When you don’t optimise your models, your game risks dropping frames, stuttering, longer load times, and worse player experience. For example, one summary suggests that reducing polygon count by 50% can halve load times and significantly improve frame rates.
Another study found that high-poly models created for scanning or photogrammetry need to be simplified to be viable in real-time applications such as game engines.
What this means in practical terms: if your model is heavy (lots of polygons, large textures, many materials), then no matter how good it looks, the hardware must work harder the GPU, the memory, the draw calls and that directly reduces frame rate, especially on mid-tier or older devices.
By focusing on how to optimize 3D models for games, you get an asset pipeline that supports smooth gameplay across devices. Key benefits include:
- Higher and more stable frames-per-second (FPS).
- Faster loading and less lag when scenes change or objects spawn.
- Ability to target wider hardware (mid-range PCs, consoles, mobile).
- Better memory usage and less risk of crashes or performance bottlenecks.
Optimization Explained
In simple terms: you want your 3D model to look good and run well. To achieve that you reduce unnecessary complexity while preserving essential visual fidelity.
Here’s how I define it step-by-step:
- Geometry – reduce polygon/triangle count where possible.
- Textures & materials – optimise texture sizes, atlases, number of materials.
- Level of Detail (LOD) – provide multiple versions of the model for different view distances.
- Mesh cleanliness – remove hidden geometry, redundant vertices, bad topology.
- Engine readiness – ensure the model is integrated into the game engine (e.g., Unity or Unreal Engine 5) with best-practices: draw calls, batching, efficient use of materials.
One article sums it up: “3D model optimisation is the process of reducing the size and complexity of a 3D model in a way that doesn’t hurt its visual quality.” ThePro3DStudio
Step-by-step workflow:
1. Set your target hardware and budget
Before you dive into optimisation, decide what your game is targeting. Mobile? Mid-tier PC? Console? VR?
For example, one guideline suggests: for mobile target perhaps 5,000-10,000 polygons and 1024×1024 textures; for desktop maybe 50,000-100,000 polygons and 2048×2048 textures.
By choosing your target, you set realistic constraints. That means when modelling you aren’t blindly creating mega-detailed meshes, you’re creating something optimized from the start.
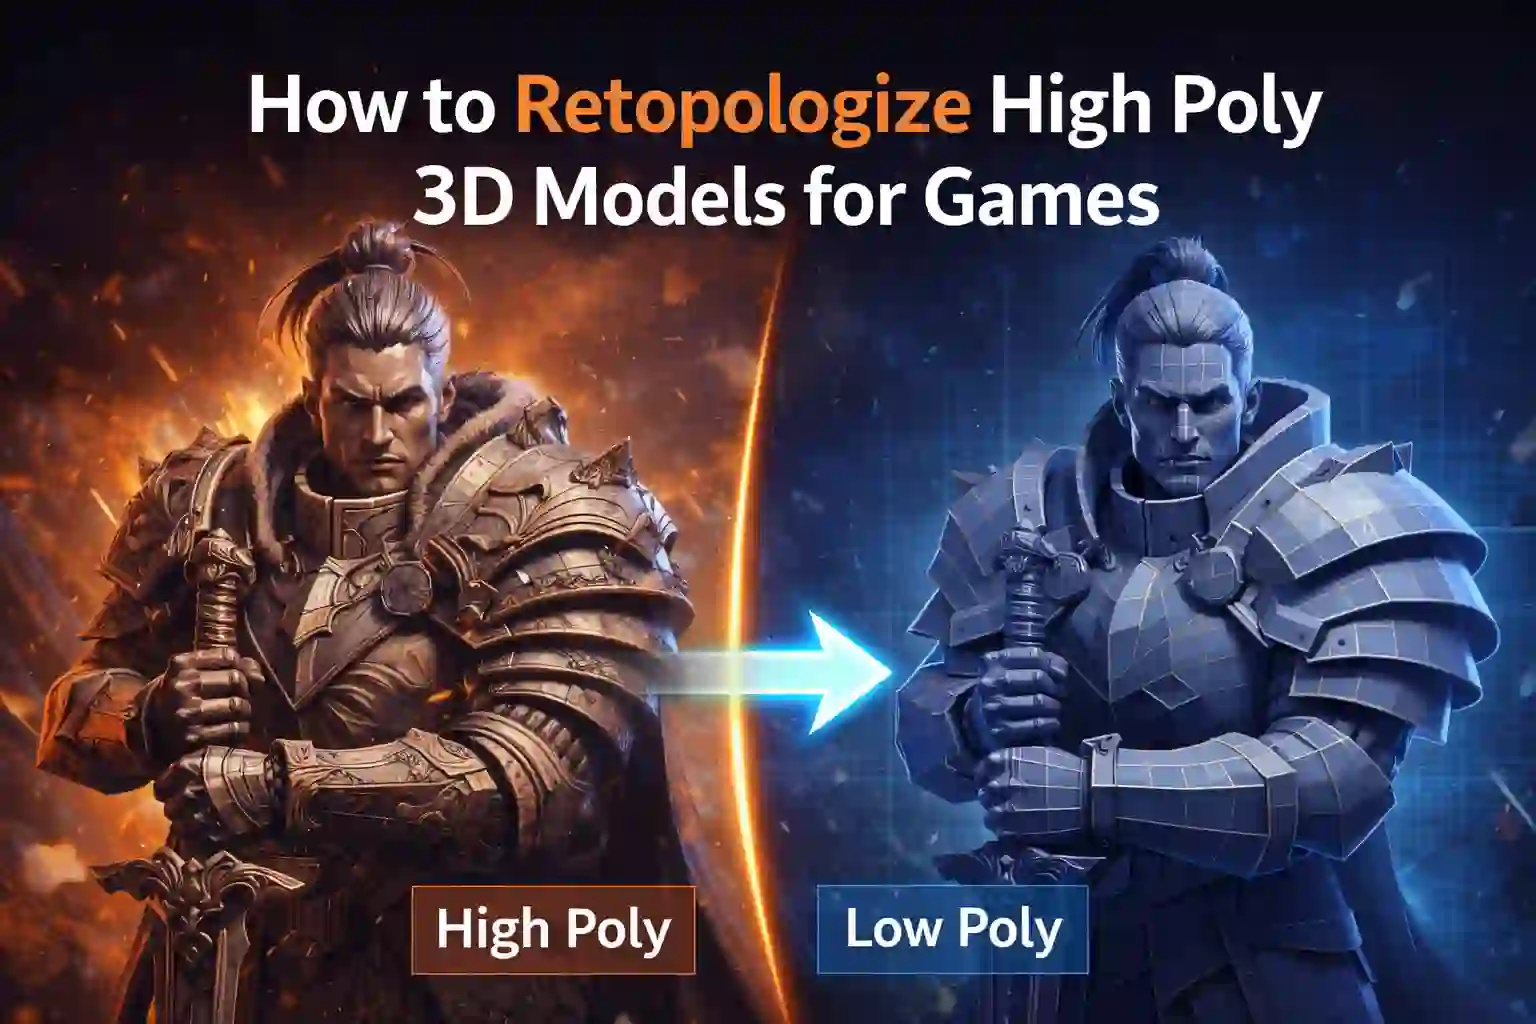
2. Polygon count and geometry optimisation
Since geometry is often the biggest performance cost, I focus here first.
- Use decimation tools (e.g., in Blender, Maya) to reduce triangles where they don’t contribute to the silhouette. ikarus3d.com+1
- Create different LOD versions: high, mid, low. For example: a character might be 20,000 tris up close, 10,000 at medium distance, 2,000 when far away. Alpha 3D
- Remove hidden or internal geometry (faces that will never be seen) and merge where possible.
- Clean mesh topology: avoid n-gons, fix edge flow, ensure good deformation for animated models.
In one technical paper, low-cost 3D scanned models needed both polygon and texture reduction to become performant in VR.
3. Texture and material optimisation
Textures and materials are the next big cost. Here’s how I approach them:
- Choose appropriate resolution: only use 2048×2048 or higher for major hero assets; use 1024×1024 or lower for smaller props. Alpha 3D
- Combine textures into atlases to reduce draw calls. Fewer materials = faster rendering.
- Use normal maps instead of geometry for surface detail. This keeps visual richness without high poly. ThePro3DStudio
- Compress textures with proper formats for target platform: for mobile, use ASTC or ETC2; for PC/console, BC7 is good. Alpha 3D
4. Level of Detail (LOD) and draw distance strategy
Using LODs means the engine shows simpler versions of models when they’re far away. This is a big performance win.
Because rendering a high-detail model for something far off the player is wasteful. The concept of draw distance says that if you render too many polygons far away, you hurt performance.
What I do:
- Create 3-4 LODs per model (hero > mid > far > billboard)
- Set the switch distances in your game engine so that high LOD is only used when needed
- Incorporate culling and occlusion if supported so objects not seen at all aren’t rendered
5. Mesh cleanup & efficient asset structure
Little things add up. Here are my habits:
- Remove unused materials.
- Merge objects that share the same material where possible (reducing draw calls).
- Clean UV maps: efficient use of UV space, fewer seams, avoid overlapping UVs unless intentional.
- Ensure correct pivot/origin, group hierarchies make sense. This helps engine batching and instancing.
6. Engine integration and profiling
Once the model is in your game engine (Unity, Unreal, or whichever you use), you must test it under real conditions. What I check:
- Load time impact.
- Frame rate with the asset present in scene.
- Memory usage (GPU memory, RAM).
- Draw calls / render batches.
- Performance on lowest target device.
For example, Unity’s blog emphasises that asset and graphics configuration can hugely affect mobile performance.
7. Iterate and measure
Optimisation isn’t a one-and-done affair. After the first build:
- Capture metrics (FPS, load times, memory).
- Identify the biggest bottlenecks.
- Go back to heavy assets and reduce further if necessary.
- Always keep the visual-to-performance trade-off in mind: sometimes you accept less detail for smoother gameplay.
Real-world results and figures
- A guideline suggests that reducing polygon count by 50% can halve load times and significantly improve frame rates. Alpha 3D+1
- One study about scanned models found that optimisation was essential to make them performance-friendly even when visual quality was high. MDPI
- On mobile, the thesis “Optimization of 3D Models for Mobile Games” found that unoptimized assets were the largest contributor to low graphical performance, with draw calls being a major cost. Theseus
These numbers reinforce that the effort you put into optimisation pays off in measurable ways.
Helpful asset source: best free 3D models for games
While it’s best to learn to optimize 3d models for games, using well-made assets can save time and open you to better starting material. One valuable resource I’ve found is the Animatics Assets Store. They provide game-ready free 3D assets curated for optimization.
Here’s why I mention it:
- They often supply assets that already have sensible polygon counts, texture resolutions, and engine readiness.
- You can use them as benchmarks: import one asset, profile it, see how it performs, then compare your own.
- When you’re short on time, having a proven asset can allow you to focus your custom effort on other areas.
Even if you create everything yourself, it’s worth exploring such stores to save time and establish best practices.
Key takeaways (summarised)
- Optimising 3D models for games isn’t just decoration, it’s essential for performance.
- Start by choosing your target hardware so you know your budgets (polygons, textures).
- Focus on geometry first: polygon count, LODs, mesh cleanup.
- Then optimise textures/materials: atlases, compression, normal maps.
- Use LODs and culling to avoid wasting rendering power on unseen or distant objects.
- Clean your mesh structure and asset hierarchy for batching and efficient rendering.
- Integrate into your game engine and profile . Measure FPS, load times, draw calls.
- Iterate: optimisation is ongoing, not once-and-done.
- Use good free assets from places like Animatics Assets Store not just as placeholders, but as reference or even production-ready if they meet your needs.
- Optimisation gives real gains: halved load times, smoother 60+ FPS gameplay, broader device reach.
Final thoughts
Making a truly smooth game experience means recognising that art and performance go hand-in-hand. By learning how to optimize 3D models for games, you make sure your beautiful assets don’t become a burden to the engine or a bottleneck for your players.
Think of it as building a sports car rather than piling on heavy weights. Every polygon, every texture pixel, every draw call matters. And by following this workflow you’ll be well on your way to assets that look great and run great.
Whether you’re just starting or refining your pipeline, keep optimisation front and centre. Your players (and their graphics cards) will thank you.
Latest Blog